
I posted a flat lay of this Blank Slate Novelista Shirt on Instagram the other day with some thoughts on how creating often leads to worshiping my Creator. The comments on that post just solidified those thoughts even more. When we create we are echoing what our Creator did in making this wide world and everyone in it. We are made in His image with this amazing ability to create. I firmly believe every human being has the ability to be creative. I can identify creativity in my friends in areas like their handwriting, exercise, parenting style, store displays, writing, cooking or teaching. I hope you take time to explore and develop your gift while acknowledging the Giver who deserves all the glory. This is where the worship comes in!

When Indie Sew announced this year's Shirt Month, I knew it was time to participate and sew my first button up shirt. I settle on Blank Slate Novelista because of the classic style and princess seams. I worked really hard on my pattern placement, so those princess seams would nearly disappear with the stripe alignment.

I didn't want to fiddle with placket alignment, so I cut the placket on the bias to eliminate the need for stripe matching and add a design element. The fabric is a chambray plaid from my great Aunt's stash. She had some great shirting fabrics! I plan on pairing this shirt with white jeans for the spring. I really wish I had pulled them out for these photos.

I did a few adjustments to get the fit right. Thankfully I was able to consult with Melissa for a few tips! The length was the biggest adjustment. I added 1.5" to the bodice pieces and 1/2" to the sleeves. I narrowed the shoulders 1/4" at the princess seams and did a forward shoulder adjustment. This was all so new to me!
The biggest benefit to sewing a button up shirt for myself was button placement. I have a low bust apex meaning the widest part of my bust falls lower than where most clothing is designed for. Button up shirts are ALWAYS gaping open in an inappropriate way. By sewing my own, I am able to strategically place a button exactly at my bust apex to prevent that dreaded gaping.

Since I lengthened the shirt to hit more at my hips, I ended up with some pooling at the back with my muslin. I added some width to the center back to reduce the effect. I could probably scoop some out with the princess seams, but this amount doesn't bother me at all.
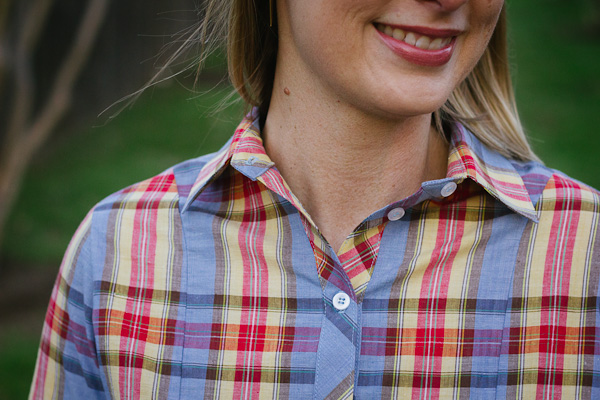
I used Heather Handmande's professional collar tip and Mie's topstitching tip for sewing the collar. It came together much easier than I had envisioned. Allie, Indie Sew, shares some time saving button sewing tips in her Instagram highlights too.
I am eager to try out a few other button up shirt patterns now to practice other techniques. I wasn't a huge fan of the sleeve placket here, so I'd like to try out another method. The Hey June Cheyenne is next on my list of button-up shirts to try. Do you have a favorite?
** This post contains affiliate links. By purchasing through my links, I receive a small compensation which I will in turn use to share more inspiration with you.**
